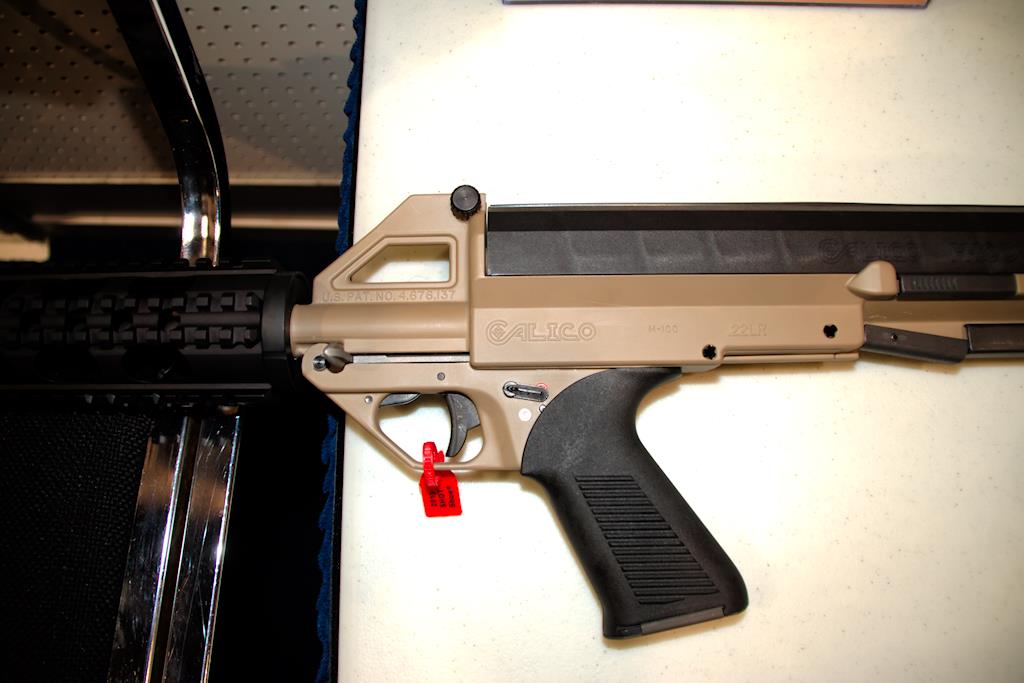
A Quick Glance at the Century Arms Calico Line
Back in the 1990s, Calico Light Weapons Systems introduced a line of guns. Their distinctive feature was being fed by helical magazines, which held the promise of drum-magazine-like capacity without the same side-to-side bulk and potentially fewer spring tension issues. A similar helical magazine was used in the Russian Bizon submachine guns. As a collector of unusual firearm actions, I find the Calicos to be compellingly interesting, so I took a number of pictures at the 2013 SHOT show. Unfortunately, at the 2016 SHOT show my follow-up with Century revealed that their plans to produce new Calicos ultimately fell through, and that there is no present forward path for the Calico system. There are some changes between the original Calico design and Century Arms' version, the most visually discernable of which is that they've modernized the look by adding picatinny rails.Calico Liberty III 9mm pistol
 This is the left side of the M900. Notice the magazine on top (above the grip), which stores bullets "nose-down" and feeds them straight down into the action. Spent casings are extracted straight down through what would appear to the untrained eye to be a magazine well. The magazine release is the textured steel bar between the grip and the magazine, which you press from both sides to release the magazine. The protrusion forward of the ejection port is the charging handle, which pulls the bolt back and cycles rounds.
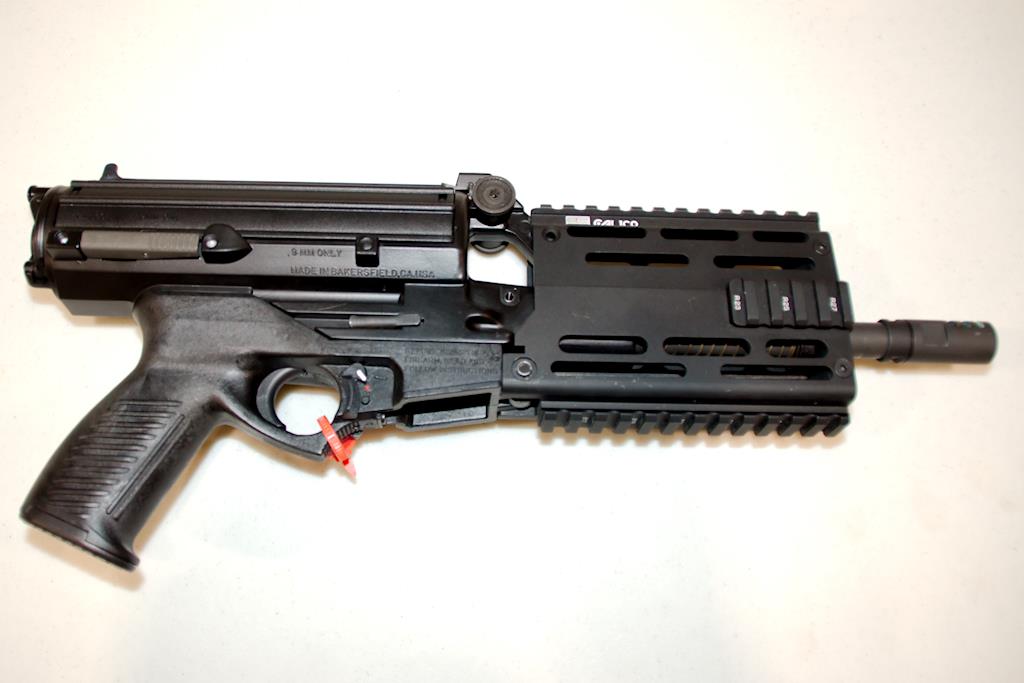 The right side view. Note that there's a magazine release lever on this side as well, BOTH of which must be pressed in order to release the magazine. As markings on the pistol show, this is a 9mm version and made in Bakersfield, CA USA.
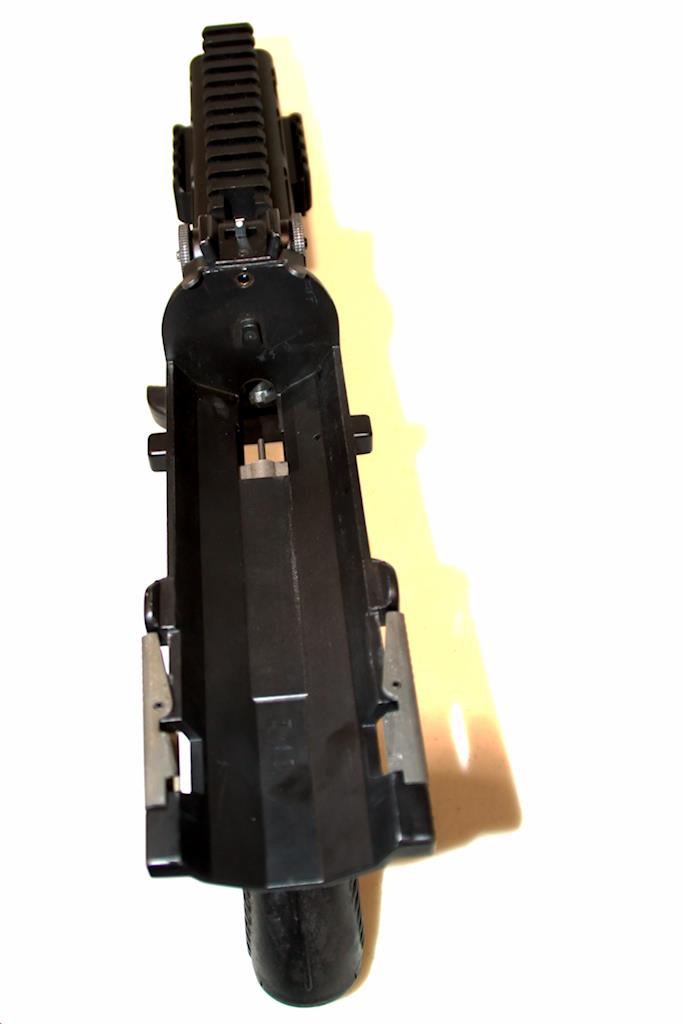
 The underside view, which shows the action through the magazine well. The bottom-side picatinny rail features armorer markings for reproducible configuration of accessories.
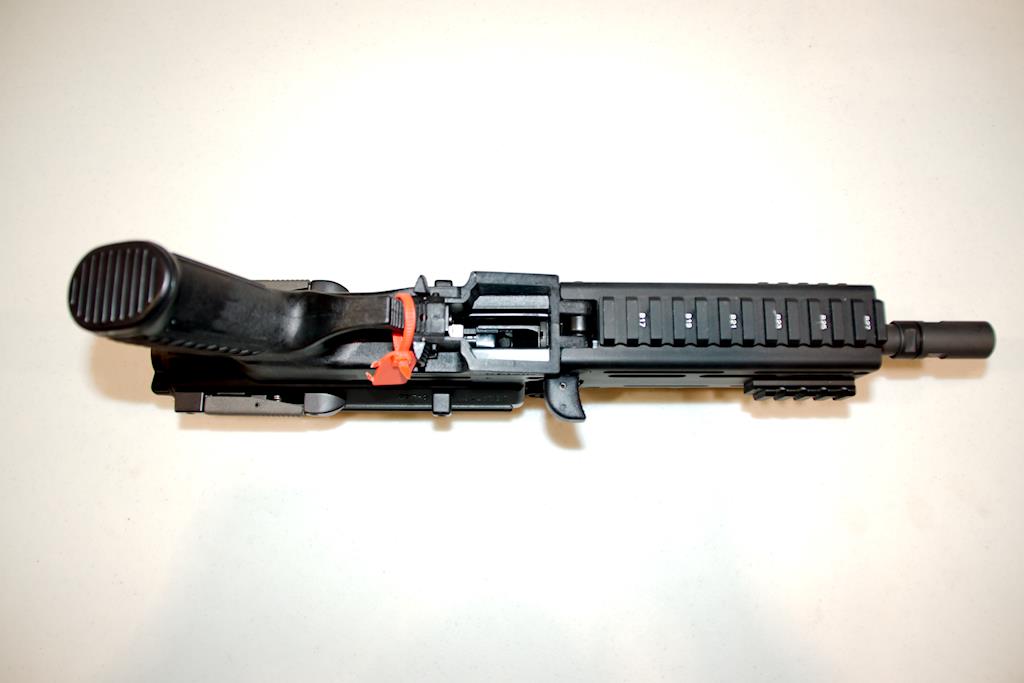
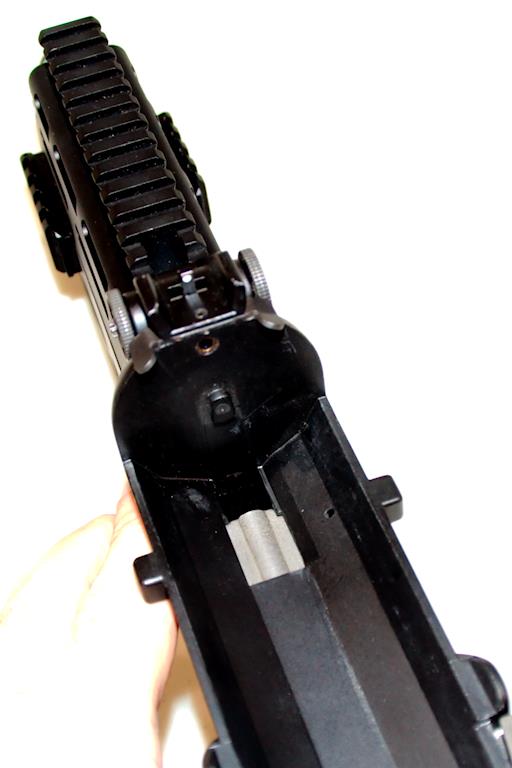
 Top rear view of the pistol, with the magazine removed. Note that the magazine clamps are not connected, so you need to press both of them to release the magazine. Also, note that while the front sight is located just forward of the magazine, the rear sight is located on the magazine itself. The picatinny mounts do permit accuracy-focused folks to install a red dot sight though, which would be my suggestion so that your sight picture doesn't wander. Note that the bolt is slightly pulled back in this picture, allowing you to see the back of the barrel just below the magazine's central point.
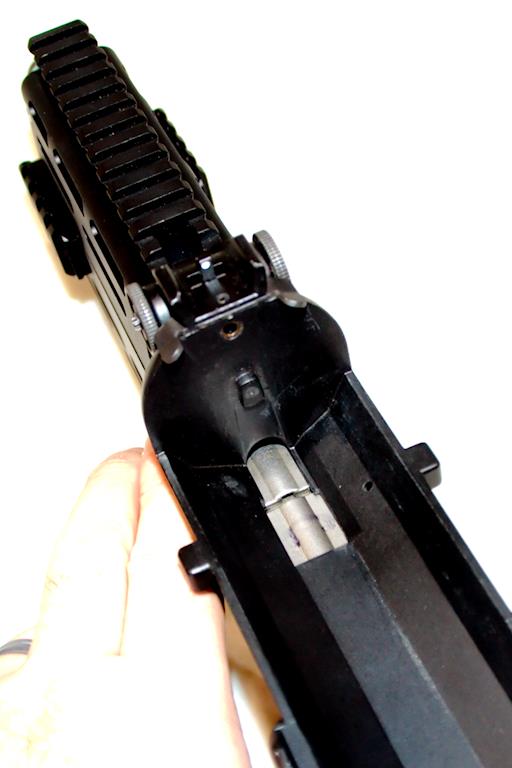 Angled rear view, with the bolt closed. Note that the front sight is adjustable via the dials to either side.
 Another shot with the bolt open.
 Left side view with the magazine removed. Note that the safety is ambidextrous, with one wing on either side of the trigger well, and that in the 'safe' position the wings intrude into the trigger well, allowing the shooter to readily tell if his weapon is on safe or not.
Detail Shots of the Magazine
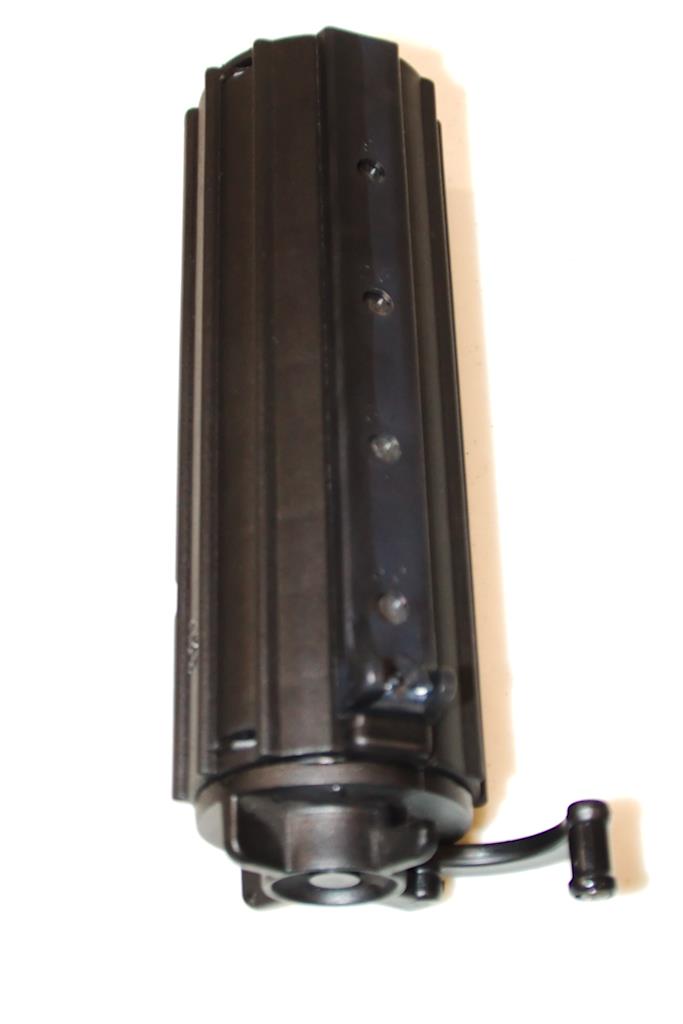 The magazine's exposed parts are black plastic, and one winds it like a drum magazine using the built-in fold-up lever.
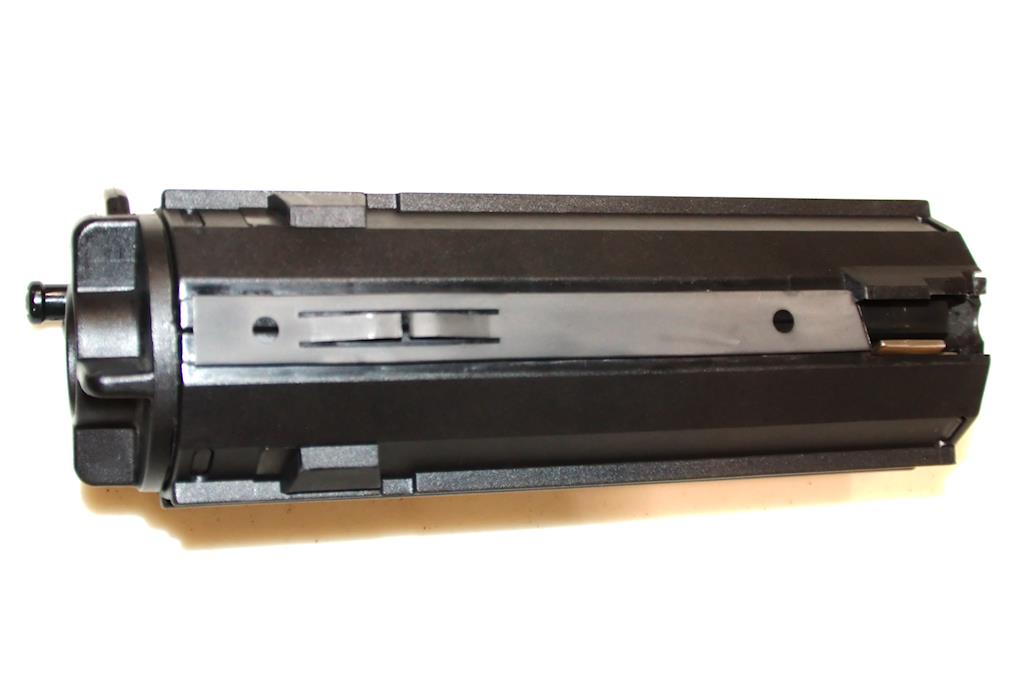 The underside view of the magazine. Note the spring, which is in order to ensure a tight fit against the prongs which hold onto the magazine. The notches on the side serve to lock in the magazine clamps I mentioned in the earlier pictures of the Calico pistol, and lastly the feed lips of the magazine are visible in the right side of this picture. When installed in the pistol, the winding tool faces the shooter and the feed lips are closest to the muzzle.
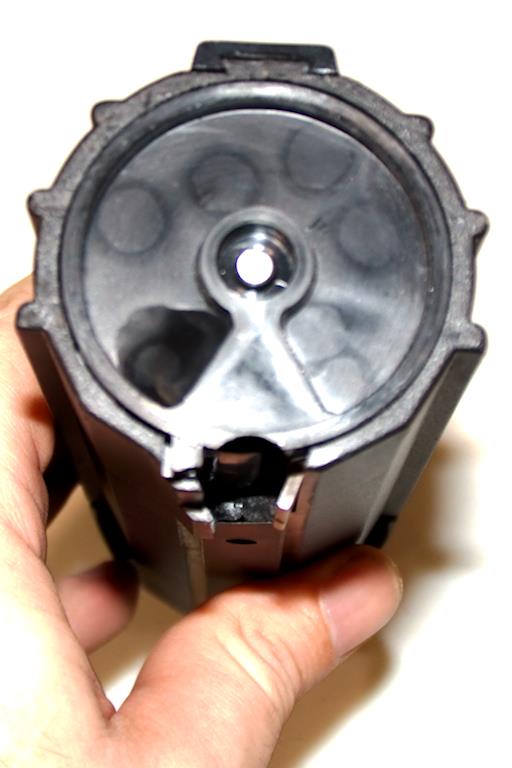 Front view of the magazine. Note that the front is a smoky, slightly transparent black plastic. There's a small notch to help guide the bullets down into the action of the gun.
The Calico M100 22LR Rifle
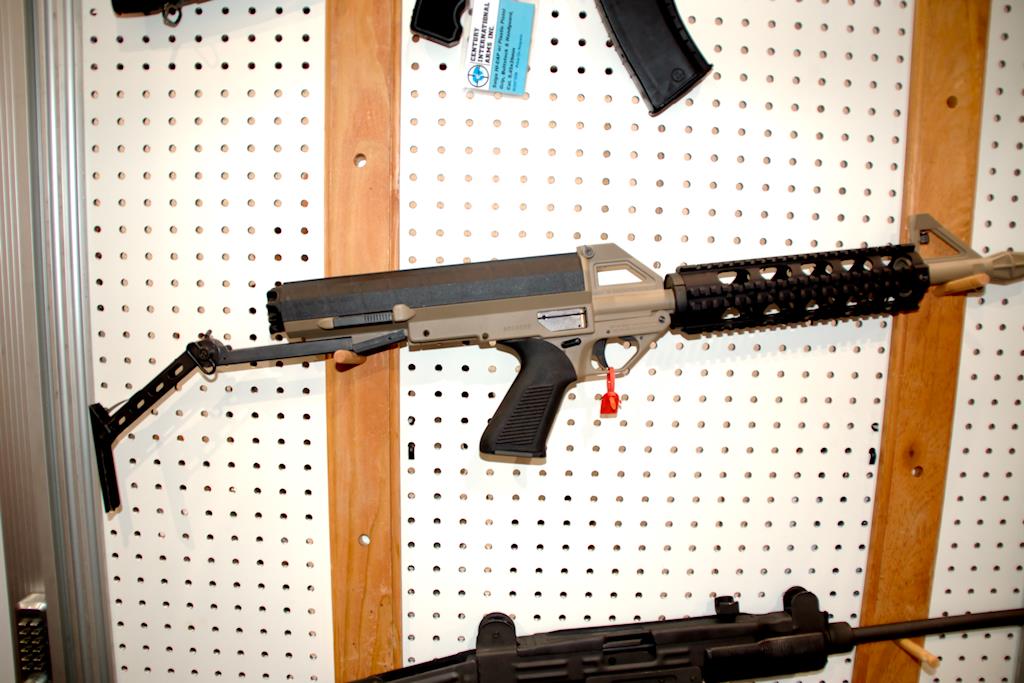 There's also a 22LR rifle, which features a right-side ejection port, an AR-15-like foreend (I don't know whether it's compatible with standard AR fore-ends, or if it's using a slightly modified version), a fold-up stock reminiscent of an Uzi design, and sights which are not fixed to the magazine.
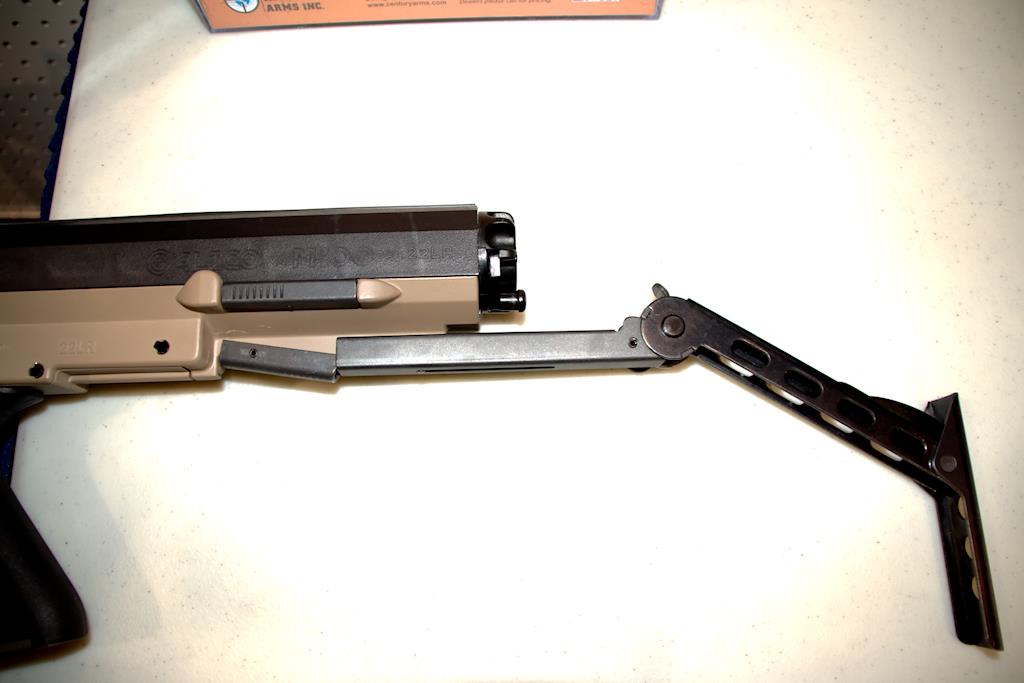 Close-up on the stock. To retract it, press down on the tab and slide it in.
 Note the left-side low-profile charging handle and the position of the safety. Like with the Liberty III, the safety is ambidextrous; there's an identical lever on the other side of the gun.
 Another close-up on the right side. I'm not sure what the metal piece forward of the trigger in the trigger well is, and would be interested to know if any commenters are aware.
 The bolt, in an open position, with the magazine removed.
 A detail shot of the dovetail sights. Note that the front sight is an AR-15 style front post sight with Y-shaped wings.
The Calico Liberty II 9mm rifle
 What I found truly noteworthy about the Liberty II was just how far its rear stock could be extended. Being a 6'2" guy, I find A2 stocks to be around right, and the Liberty II is able to extend far past the length of an A2 stock. This is a left-side view of the rifle, and note that its standard configuration has two angled pistol grips much like the old Thompson submachine guns. The Liberty II looks a lot like the Liberty III pistol, including the rear iron sights being mounted onto the magazine. However, there's a top-mounted housing designed for optics, such as a red dot sight. The stock actually slides into grooves on the forward handguard.
 A right-side view of the Liberty II. Note the sling swivel mounted on this side of the sight housing.
 A (blurry) shot of the magazine-mounted rear dot sights, along with the front sight housing. Note that this is not a picatinny rail, but I'd be surprised if they don't have an available Picatinny spec top for it.
 Another left view, with the stock extended as far as it will go.
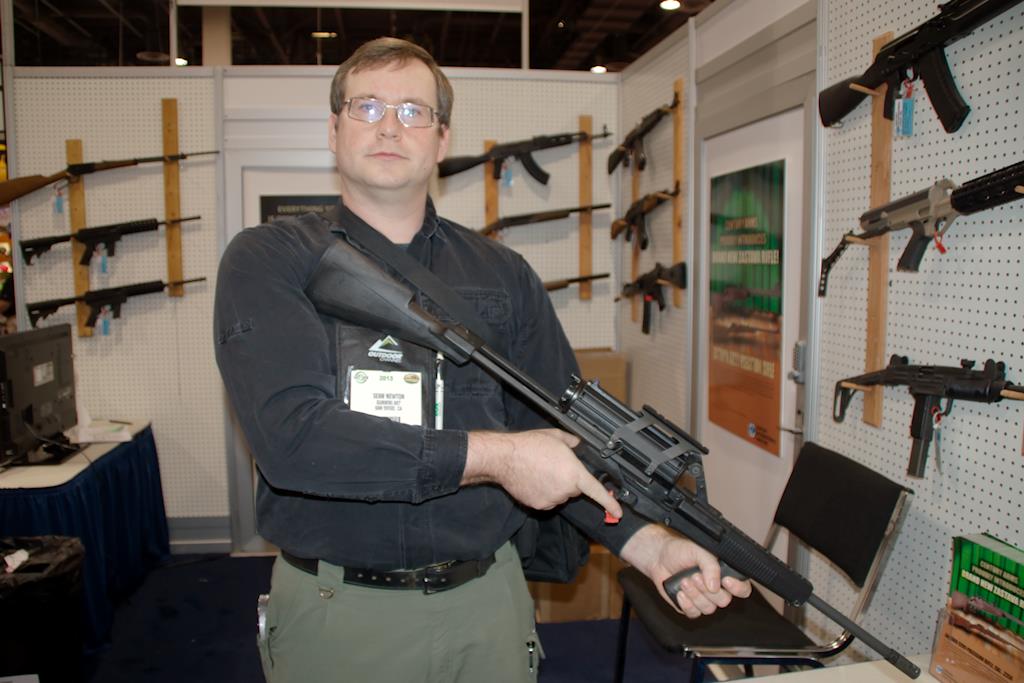 The author of this article, holding the Liberty II in its most extended position. This is the first time I've ever seen an adjustable stock which is actually really too long for my arms, but the Liberty II is actually capable of this. The next time a 7' tall guy is complaining that all buttstocks he's ever used are too short for him, he should consider this rifle.
-- SeanNewton - 02 Dec 2013
This topic: Gunwiki > WebHome > GunsAtaGlance > CenturyCalico
Topic revision: r3 - 11 Jan 2017 - SeanNewton
Ideas, requests, problems regarding TWiki? Send feedback